The User Override Menu allows you to pin input parameters to the Results screens of your model. This allows users to make changes to the values of these variables, rerun the model, and observe the impact on such changes without needing to leave the Results pages.
By default, the model time frame and the discount rates for both outcomes and costs will be pinned to the User Override Menu. These are the only model parameters which may not be added and removed from the User Override Menu. Like all other input parameters pinned to the User Override Menu, the values of these parameters will be pre-populated with their respective model values—in this case, those entered on the Settings Page.
Another important function of the User Override Menu is to select the model parameters that can be changed in a model that is shared with someone who has View-Only privileges. Users with View-Only privileges can only change the values model parameters that have been pinned to the User Override Menu by the owner of the model.
To change the value of a given variable in the User Override Menu, simply click on the input field next to it, enter the desired value, and hit the Enter key or click outside the input field. Base case results will automatically be recalculated if you change the value of an input parameter in the User Override Menu; sensitivity analyses will need to be rerun manually, however, by clicking the ‘Run’ button.
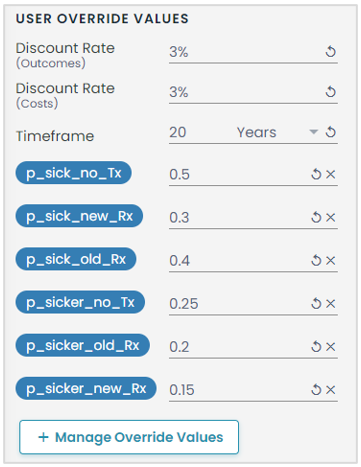
To reset the value of an input parameter to its original value, simply click the "reset" button located to the right of the input. To remove an override value, click on the ‘delete’ button on the far right of the input.
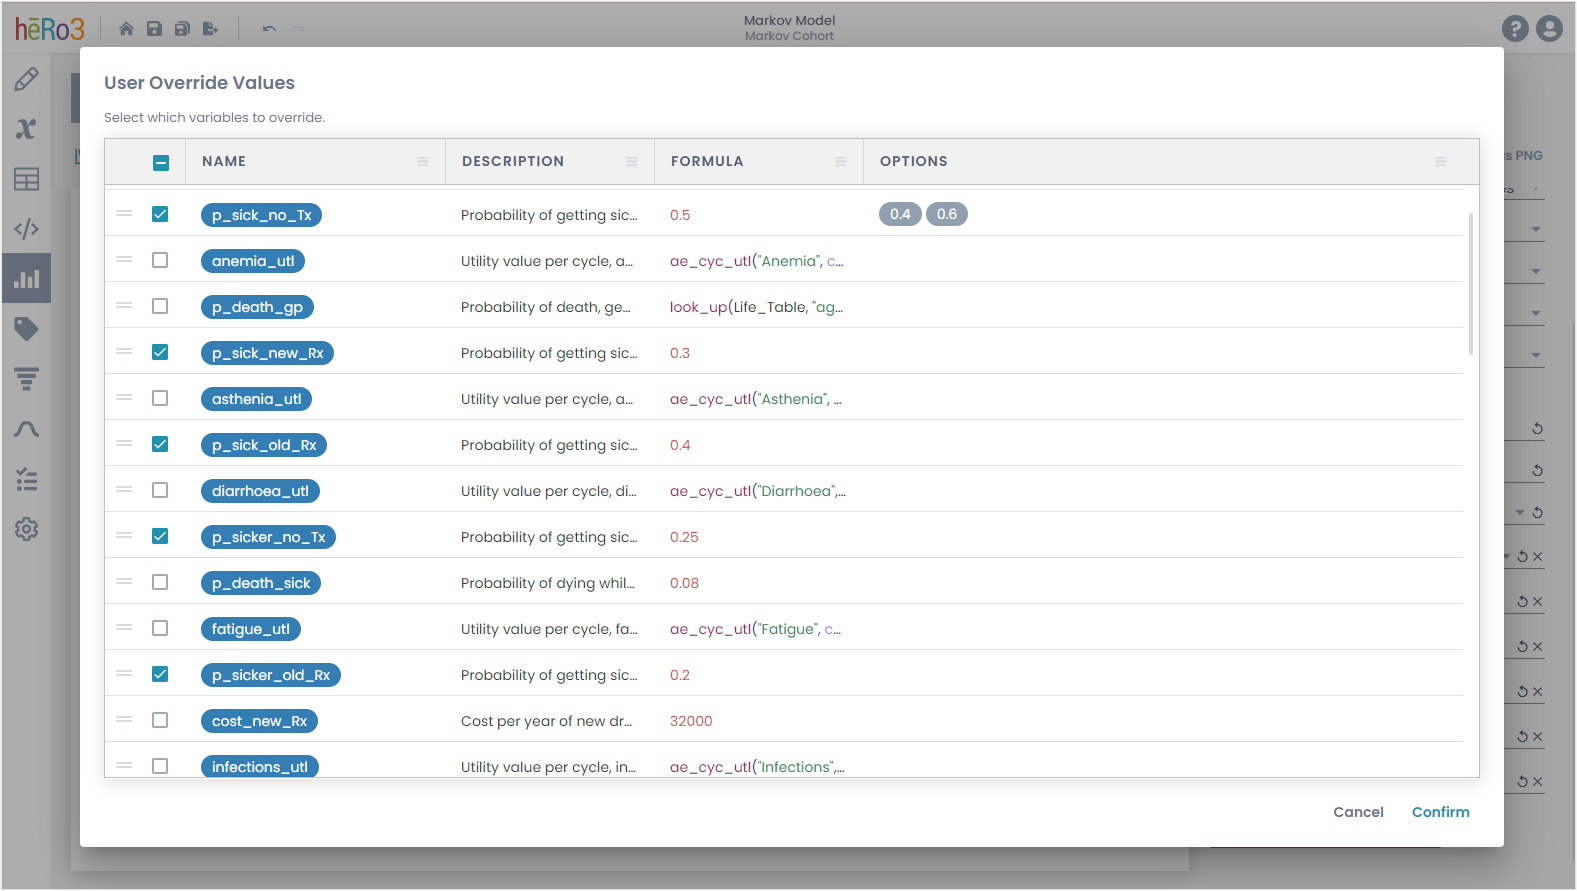
To select which variables should be added to the User Override Menu:
- Click the ‘Manage Override Values’ button in the Configuration Sidebar on any Results screen.
- In the pop-up menu, check the variables that you would like to be included in the User Override Menu.
- Use the drag handles to order the selected variables in the order that you would like them to be displayed in the ‘User Override Menu’ on the Results screens.
- If you would like to restrict the possible values that an input variable can have to a list of options, simply populate the ‘Options’ column of that parameter with the values you would like to include, formatted as a comma-separated list.
- When done, click ‘OK’
TIP: Users can filter and sort (individually or in combination) on the 'Name' column to organize and temporarily limit their view to items of interest. Users can also copy and paste to quickly populate values of inputs under the 'Options' column. You may find descriptions of additional functionality available on this page, and other similarly structured pages, here.